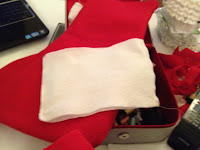
Materials bought from:
- Michaels (craft felt- can be bought in a large pack and also small sheets; ribbons)
STEP 1:
- Lightly sketch out the outline of a stocking on a piece of felt (the size of the felt you use will depend on the size you would like your stocking to be) and cut it out
- Next, pin down the outline that you just cut out to another piece of felt and also cut it out so that you will have pieces of felt, shaped like a stocking, pinned together
STEP 2:
- Keep the pieces pinned together and starting sewing about half an inch from the edge (I sewed the edge with my sewing machine first and then I sewed it one more time by hand, but just sewing by hand will also do)
- I recommend sewing it using the loop- technique for a more secure stocking
*simply pierce your threaded needle away from yourself, through to the other side and pull it all the way but don't forget to knot the end
*then pierce your needle through the felt again, approximately 3 cm from your first puncture (the needle should be coming towards you) and before you pull it all the way, loop it through the U-shape that your thread has created, and now pull it all the way
- Repeat that step until you have sewn up the entire stocking (leaving the top of the stocking open)
STEP 3:
- Take two pieces of white felt and trim it so that each of the pieces is a couple centimeters wider than one side of the top of the stocking
- Then, pin these two pieces together on the two ends (left and right) and see if it fits over your stocking
- Keep adjusting the pins and the size of your white felt until it fits perfectly over the opening of the stocking and sew the two sides together
STEP 4:
- flip the stocking and the white felt inside out (with the stitching on the inside and)
- slide the stocking in between the opening of the white felt (from the bottom) until there are two inches of the white felt sticking out at the top and then tuck these two inches into the stocking
- If you intend on decorating the white part of stocking then stitch it down an inch from the top (because when you add ribbon to the top, it will cover the stitches anyways), but if you are not going to decorate the top then I recommend gluing down the white part using a hot glue gun or fabric glue
STEP 5:
- Select some ribbon of your choice and glue it down wherever you like, using a hot glue gun or fabric glue
* After this step, your stocking is complete but if you are interested in adding more decorations then please move on to STEP 6
STEP 6:
*I made a snowman to decorate my stocking with (gingerbread man and reindeer would also be very cute)
- Using the white felt, cut out two circles (one big and one small), then cut out accessories for the snowman (the key is to pin everything down first before gluing or sewing anything)
- Next, glue or sew all your pieces together
STEP 7:
- glue your decoration onto your stocking
*I recommend gluing instead of sewing for this last step so that you won't see the stitches but be sure to use fabric glue or a hot glue gun because regular glue/gluesticks may not be sturdy enough)


No comments:
Post a Comment