Monday 24 December 2012

Two-min Decoration Idea

This year, I bought new ornaments for me tree but I was only enable to keep a few of my old ones that actually matched my new set.  I thought it would be too wasteful to throw them out so I used them to make another decoration piece.  This piece only took two mins to "make."  The materials consist of a vase, ornaments and ribbon.

Instructions:
- rearrange ornaments in the vase 
*TIP: I think that purposely rearranging it to look "random" is nicer than trying to follow a pattern
- Glue/tape ribbon around the vase and tie the ends into a bow

Sunday 23 December 2012

DIY Centerpieces- My favorite DIY project so far

This year, I decided to make my own centerpieces and it turns out that it's actually very easy and inexpensive to make ones that look very nice.  I made two different pieces for my dining table.  Each of them cost roughly around $6 in materials.


Materials bought from:
- Dollarama (square vase, ribbon, plastic flowers and a foam brick)


INSTRUCTIONS (to make the one on the bottom)
STEP 1:
- Use a knife and cut out a small piece (about 2 inches thick) from your foam brick and trim the sides so it fits perfectly at the bottom of your vase (if needed)
STEP 2: 
- Using pliers, snip the flowers and leaves so that the stem of each flower is a bit longer than the height of your vase 

STEP 3: 
- Start arranging your flowers by placing them in the vase and use the foam at the bottom to make sure your flower stands upright 
*tip- start with the bigger and more eye-catching flowers that you would like to use as the center of your piece so that it'll be easier to decide where to place the other pieces
- For the main red flowers, I used 5 of them- one sticking out from each side of the vase and one in the center (for a layer effect, the one in the center sticks out higher than the rest)

STEP 4:
- Add the other flowers and plants that you have chosen
- For this piece, I used three stems of gold leaves to surround the red flower in the middle, and two gold pine cones, placed at opposite corners of the vase

STEP 5:
- Measure your ribbon around the vase and cut out two separate pieces that are long enough to wrap all the way around the vase

- Next, glue/tape the ribbon strategically so that it covers the foam brick at the bottom
- Finally, tie a nice bow and tape/glue it to the front


*TIP:
- If you used tape like I did and realized that some of the tape is sticking out, then you can try placing another decoration (i.e. a piece of leaf) in middle of the bow (see below)
- If you like the design of the arrangement beneath, just follow the steps above but select different accompanying pieces 


Wednesday 19 December 2012

DIY Stocking

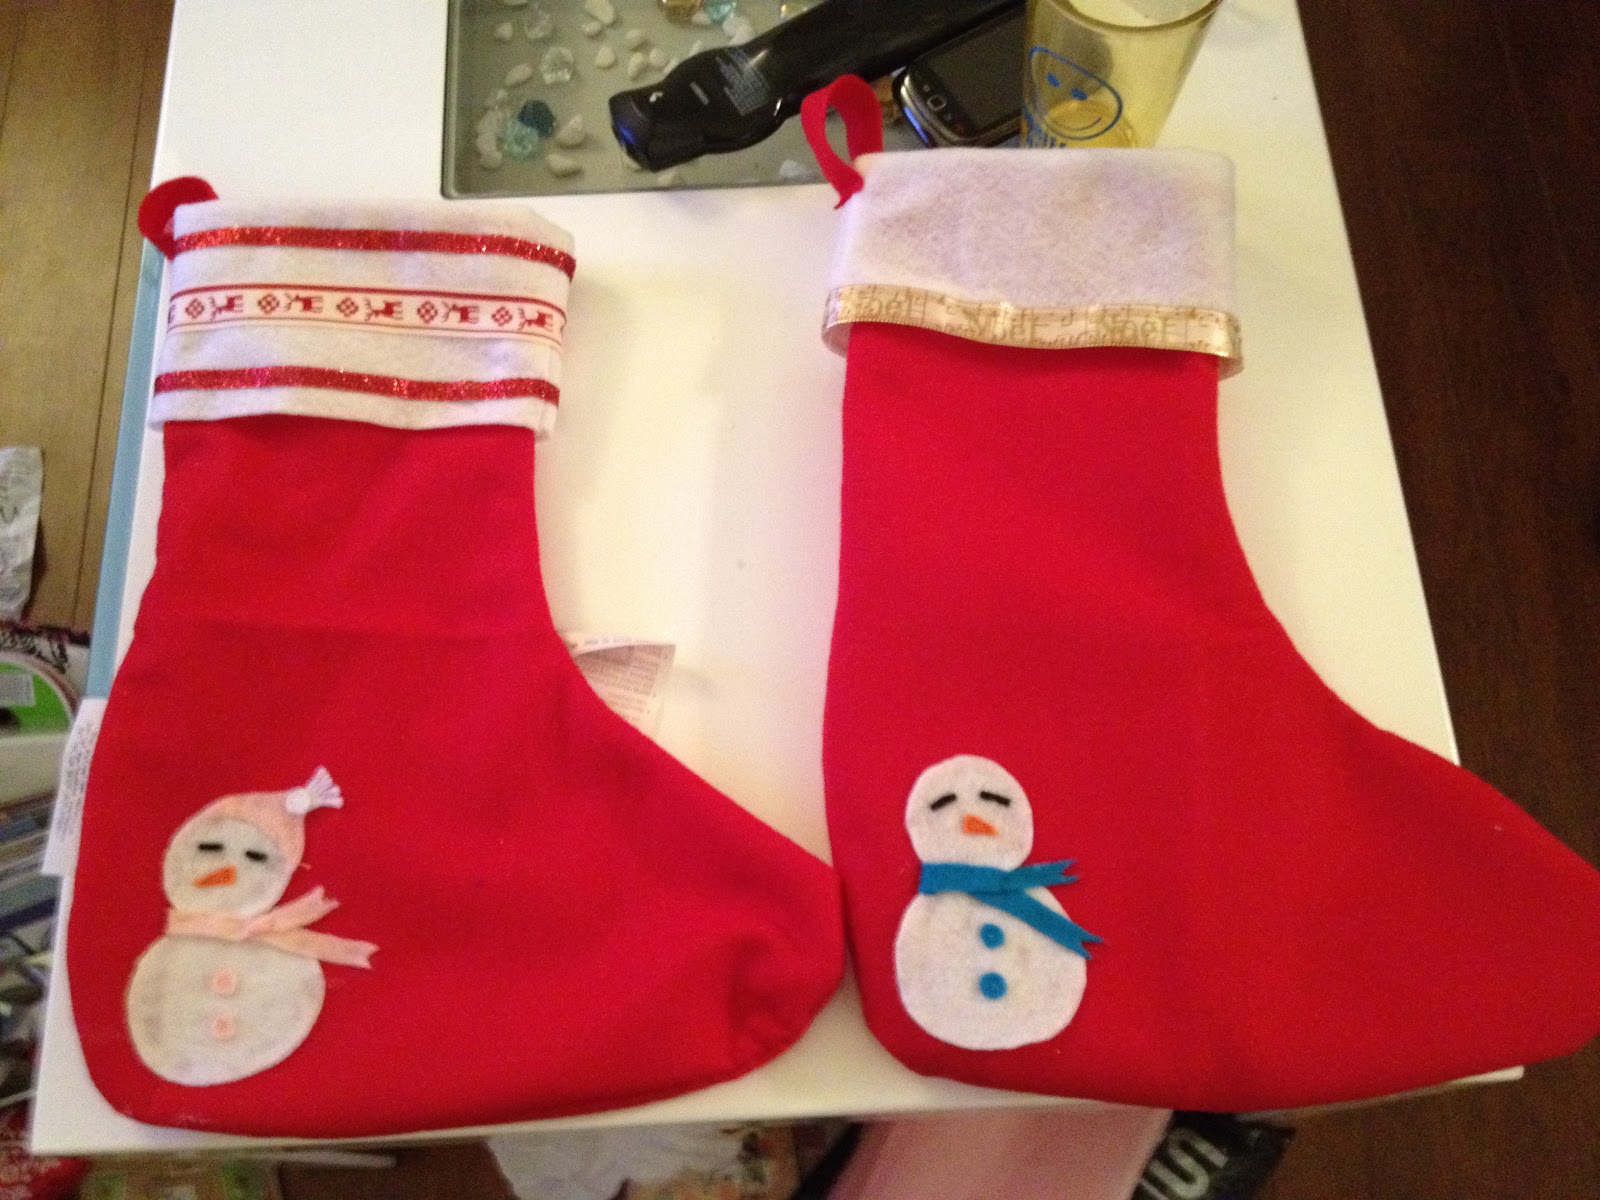
Yesterday, I finally finished these two stockings that I started on Tuesday for me and Jackey (took 2 days- a couple hours each day).  They are matching stockings with a snowman on each of them and also some designs on the top.  For Jackey's stocking, he chose to decorate it with the gold ribbon and as for mine, I chose red ribbons.


Materials bought from:
- Michaels (craft felt- can be bought in a large pack and also small sheets; ribbons)

STEP 1:
- Lightly sketch out the outline of a stocking on a piece of felt (the size of the felt you use will depend on the size you would like your stocking to be) and cut it out
- Next, pin down the outline that you just cut out to another piece of felt and also cut it out so that you will have pieces of felt, shaped like a stocking, pinned together

STEP 2:
- Keep the pieces pinned together and starting sewing about half an inch from the edge (I sewed the edge with my sewing machine first and then I sewed it one more time by hand, but just sewing by hand will also do)

- I recommend sewing it using the loop- technique for a more secure stocking
     *simply pierce your threaded needle away from yourself, through to the other side and pull it all the way but don't forget to knot the end
     *then pierce your needle through the felt again, approximately 3 cm from your first puncture (the needle should be coming towards you) and before you pull it all the way, loop it through the U-shape that your thread has created, and now pull it all the way

- Repeat that step until you have sewn up the entire stocking (leaving the top of the stocking open)


STEP 3:
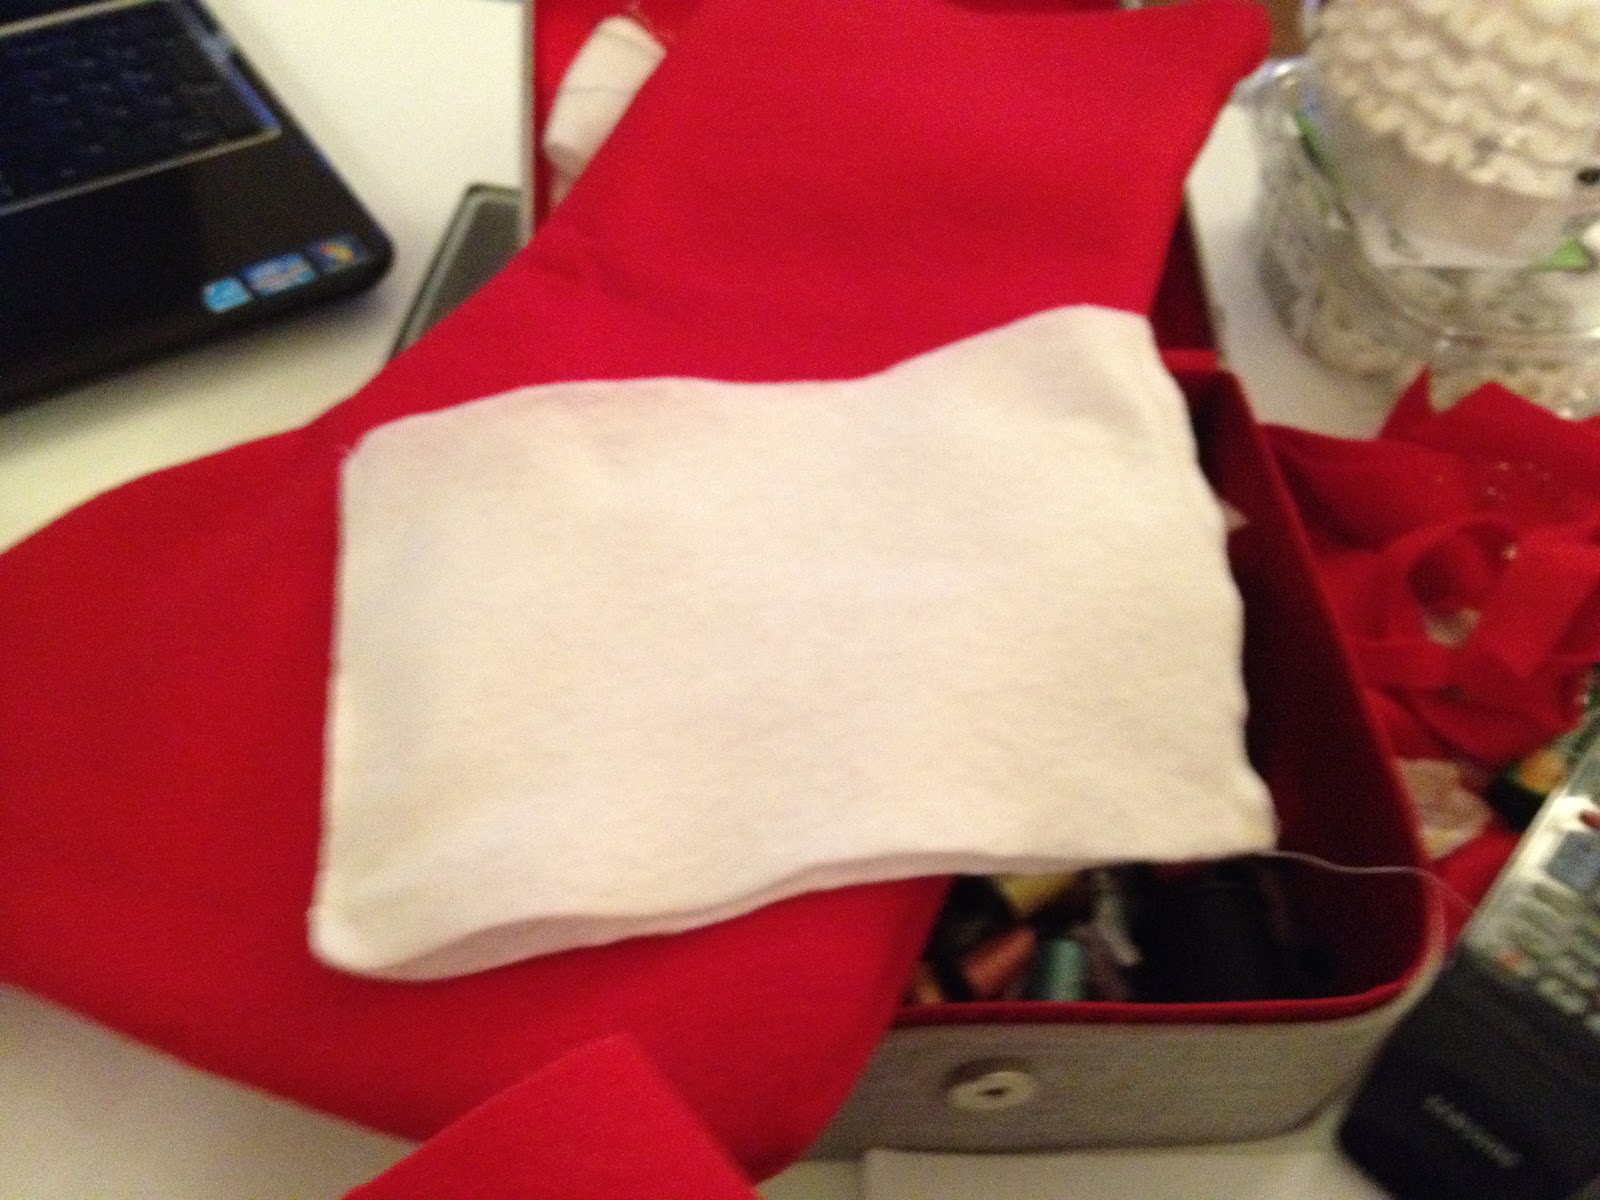
- Take two pieces of white felt and trim it so that each of the pieces is a couple centimeters wider than one side of the top of the stocking

- Then, pin these two pieces together on the two ends (left and right) and see if it fits over your stocking 

- Keep adjusting the pins and the size of your white felt until it fits perfectly over the opening of the stocking and sew the two sides together

STEP 4:
- flip the stocking and the white felt inside out (with the stitching on the inside and)

- slide the stocking in between the opening of the white felt (from the bottom) until there are two inches of the white felt sticking out at the top and then tuck these two inches into the stocking

- If you intend on decorating the white part of stocking then stitch it down an inch from the top (because when you add ribbon to the top, it will cover the stitches anyways), but if you are not going to decorate the top then I recommend gluing down the white part using a hot glue gun or fabric glue


STEP 5:

- Select some ribbon of your choice and glue it down wherever you like, using a hot glue gun or fabric glue
* After this step, your stocking is complete but if you are interested in adding more decorations then please move on to STEP 6
STEP 6:

*I made a snowman to decorate my stocking with (gingerbread man and reindeer would also be very cute)

- Using the white felt, cut out two circles (one big and one small), then cut out accessories for the snowman (the key is to pin everything down first before gluing or sewing anything)

- Next, glue or sew all your pieces together

STEP 7:
- glue your decoration onto your stocking 
*I recommend gluing instead of sewing for this last step so that you won't see the stitches but be sure to use fabric glue or a hot glue gun because regular glue/gluesticks may not be sturdy enough)


Tuesday 18 December 2012

DIY CHRISTMAS CARDS PART 1


It's been quite a while since I posted any new creations due to my busy schedule but I will be updating more frequently with different projects in the next few days. These projects will include DIY Christmas cards and simple decorations.

Here is creation #1- simple and easy to make Christmas cards


The nice feature about this card is that the front is made from transparency sheets (aka overhead sheets used for projectors), so you can see into the card and the inside.

MATERIALS BOUGHT FROM:
- Winners (card stack which can also be found at Michaels and Chapters)
- Michaels (Ribbon and stickers)
- Staples (transparency paper)

STEP 1:
- Select a color from your card stack ( This is the small sized scrapbook paper stack but you can also use other types of paper.  I chose this stack and size so that I would't have to trim the paper)
- Fold the paper in half


STEP 2: 
- Open up the card and use a pencil to draw a border that is one inch around all sides and cut along the border


 STEP 3:
- Cut out a piece of transparency paper so that it is wide enough to cover along the border of the card
- Next, use a hot glue gun (or you can use tape/glue stick) to glue the transparency paper to the card
STEP 4:
- Choose a sticker of your choice and carefully glue it down in the center


STEP 5:
- Open the card up and cut out strips that are exactly one inch thick from another piece of paper in your card stack to make a border to cover the inside of the card

STEP 6:
- Make a bow out of the ribbon and glue it to the top left corner of the card