Wednesday 26 September 2012

DIY Birthday card

It was my little nephew, Rex's birthday last week so I decided to make a birthday card for him.  The card that I made was pretty cool because it can also be used as a little name plate.


How to make it:
Step 1:
- take a piece of construction/cardboard paper, fold it in half 
- cut out a rectangle out of a piece of white paper that is one inch smaller all around than the blue card

Step 2:
- Punch 3 holes at the top (side with the fold) 
- string a piece ribbon through the two sides, come back through the front and tie a bow


Step 3:
- cut out block letters of the name of the person whom you wish to give the card to
- glue the block letters onto another piece of paper so you can cut a border about the block letters


Step 4:
- on the inside of the card, cut out another rectangle out of a piece of white paper which is one inch all around smaller than the card (you can make a border for it if you like)
- either type/write some birthday phrases/messages on the white rectangle ( you can also add other decorations like stickers or more ribbons, etc)

 Step 5: 
- glue the block letters to the front of the card and decorate it as you wish (mine has a sticker of a train at the bottom because Rex likes trains)


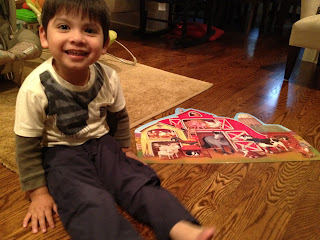
MY ADORABLE LITTLE NEPHEW!

Monday 17 September 2012

DIY Wedding card #2

I enjoyed making the first wedding card so much that I decided to make another one so I can save them for future use.  The style of this wedding card is similar to the first one but the design is quite different (which goes to show that if even with only one concept, you can create different designs and pieces from it).

FINISHED PRODUCT: (if you don't like the colors that I have chosen then feel free to use other colors)

HOW TO DO IT:

Step 1:
- take a piece of construction paper and fold it in half
- then take a white piece of paper and cut it so that on the front, it's all around one inch smaller than the brown piece


Step two:
- take another piece of paper (matching to color theme of the card) and trim it down so that it's all around one inch smaller than the white part
- next, punch four holes (evenly spaced) across the top of the card (the folded end)
- string ribbon through the holes so that it meets back at the center and tie it into a bow


Step 3:
- type and print out a nice greeting onto a white piece of paper
- trim the paper down so that it's all around two inches smaller than the inside of the card (when placed in the center)
- next, use another piece of paper and trim a border for it

Step 4:
- use stickers to decorate the front of the card (i bought this set from a discounted retailer store called B and J's Trading on Spadina because they sell nice stickers at a discounted price.  The set was made by Jolee's Boutique, which can also be found at Walmart, Zellers and Michaels)


FINISHED PRODUCTS (please find the instructions to make the blue one in the other post)


Monday 10 September 2012

DIY Wedding Card

In about two weeks, I'll be attending a wedding with my boyfriend, Jackey so I decided to make my own wedding card to go along with the present.  I am very satisfied with the results and to my surprise, it didn't take up too much time either.

FINISHED PRODUCT:

HOW TO DO IT:

Step 1:
- take a piece of construction paper, fold it in half 
- take a piece of white paper and trim it down so that it's one inch smaller all around than the card
- use a hole puncher and punch three holes on the folded side

Step 2:
- take a piece of ribbon and string it through the holes from the top (if you also punched holes on the back of the card then use another piece of ribbon to string through the back as well)
- tie a ribbon at the top
Step 3:
- take another piece of paper (whichever colour you think best matches the card, and trim it down so that it's one inch all around smaller than the white rectangle)
- choose a sticker which you think best suits the card and theme and stick it exactly in the centre (preferably a sticker which is more 3-D)- the sticker that I chose to use here is made by Jolee's Boutiques and these stickers can be found at Walmart, Zellers and Michaels.  However, I usually buy them from random discounted retailers or dollar stores because they are much cheaper!)

Step 4:
- type out a nice greeting and print it out on a white piece of paper
- trim down the piece of paper so that it's one inch all around smaller than the card and glue it on the inside of the card
- use another piece of paper (preferably one that matches the colours and theme of the card), and trim a border exactly the size of white rectangle with the greeting on it